Getting Started with nSIM
Prerequisites
You should have nSIM installed on your computer.
You also might need to set environment variable LM_LICENSE_FILE =<your_license> in case if you have full nSIM version. Otherwise you will get licensing failure.
Creating a C project
Select File >New >C Project
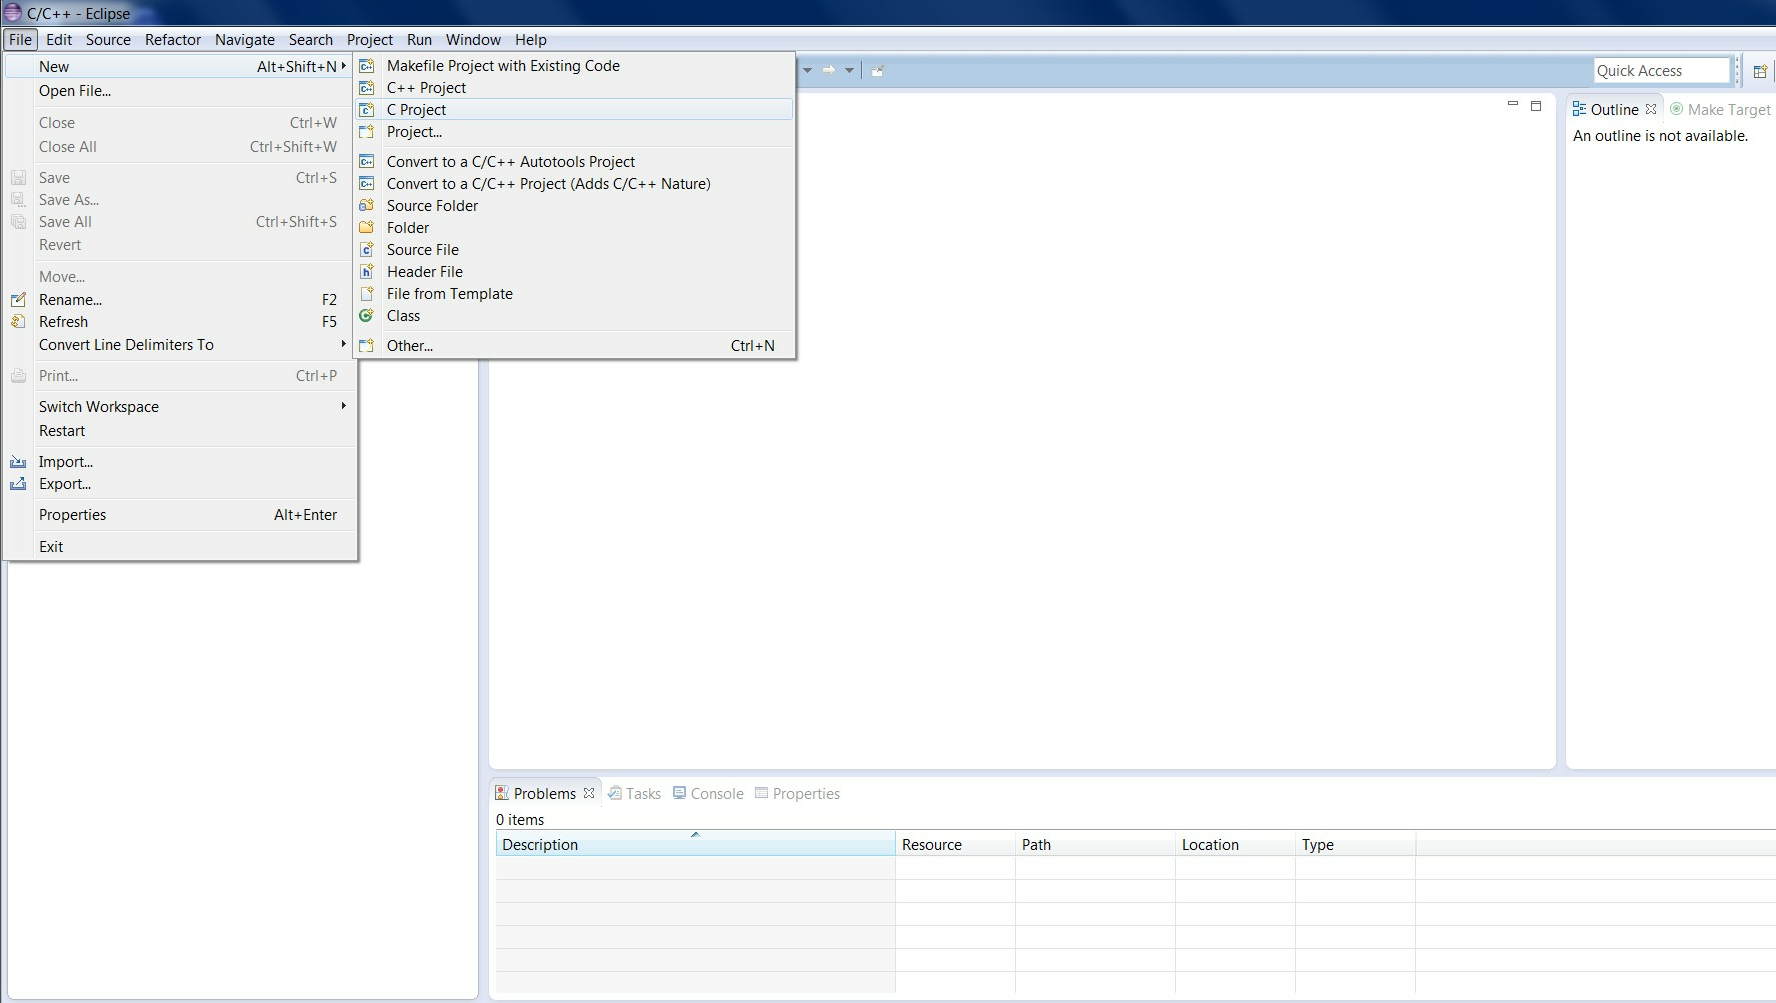
Creating a new C project
In C Project window select Hello World C Project under ARC Cross ELF32 Target Application project type.
On the right side of the window there is a list of available toolchains, select GNU Toolchain for ARC EM.
If you do not see this toolchain in the list or this project type in the list of project types, make sure that ARC EM
toolchain compiler is in the PATH environment variable or at ../bin/ directory relative to Eclipse executable.
Enter a project name
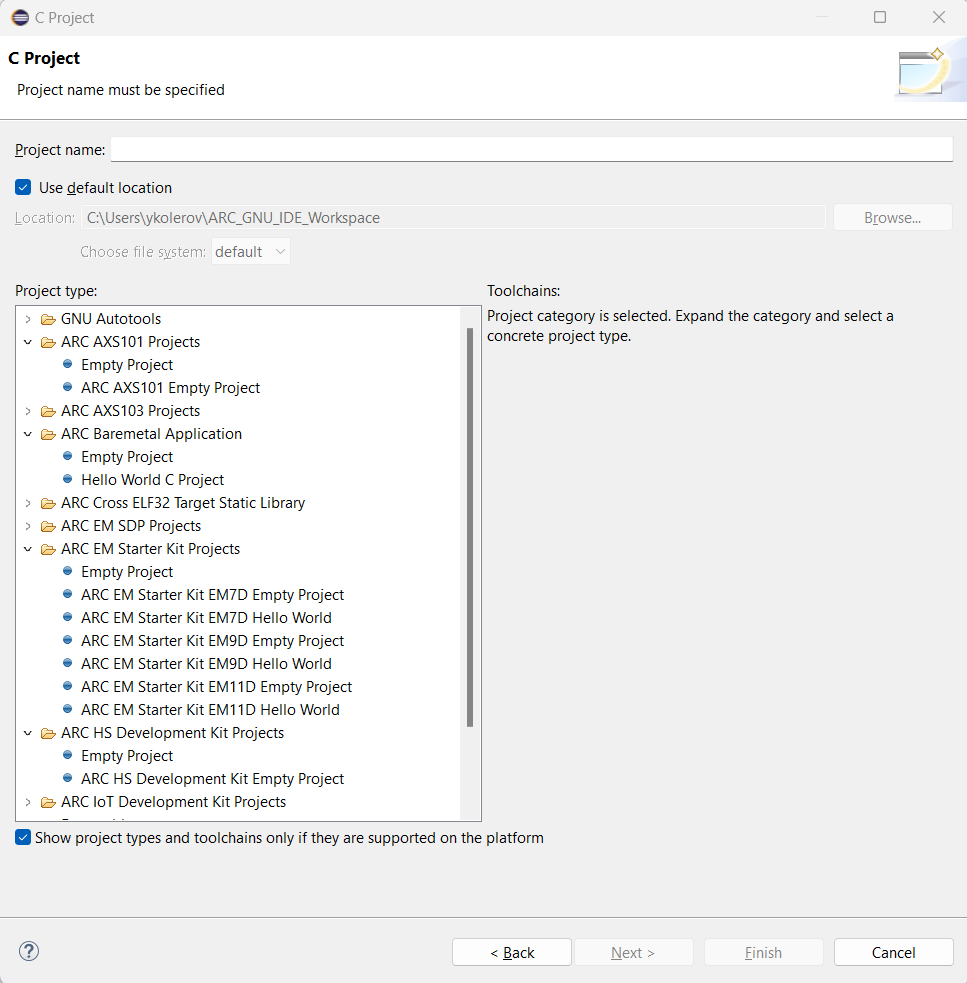
C Project Creation Dialog
After that you can click Finish or you can click Next and fill in additional information about your project.

C project creation: Additional information Dialog
Select the desired configuration and click Finish.
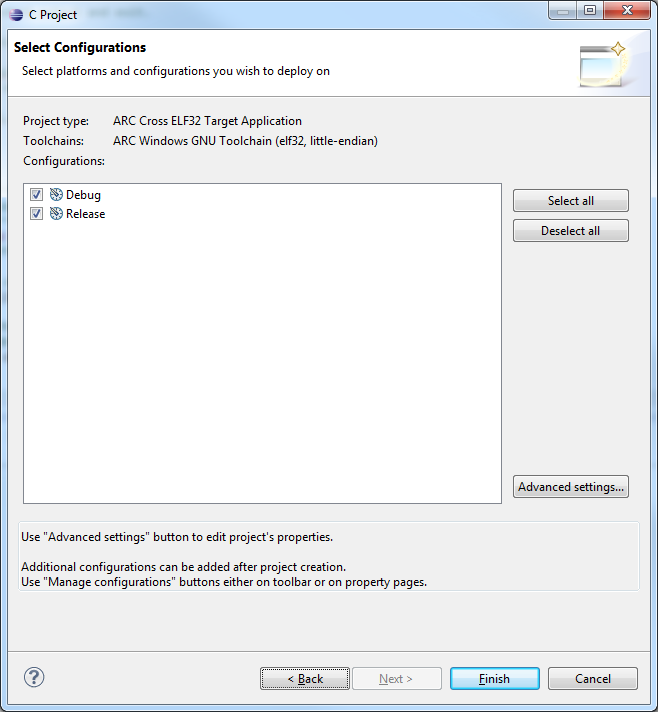
C Project creation: Configurations Dialog
The resulting Hello World project created in Eclipse is:

C Project for nSIM debugging
To change -mcpu option: Right click on project and select Properties (or Alt + Enter)
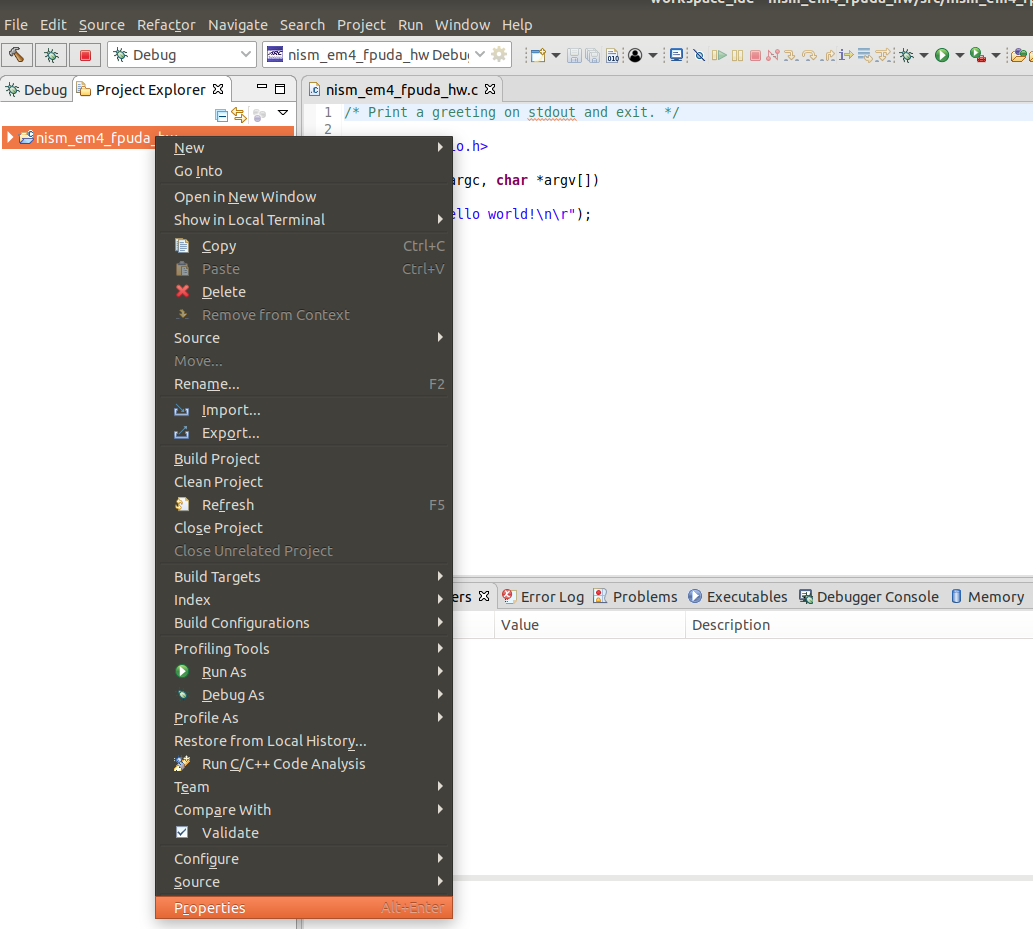
C Project Properties
Then click C/C++ Build -> Target Processor and choose required option option
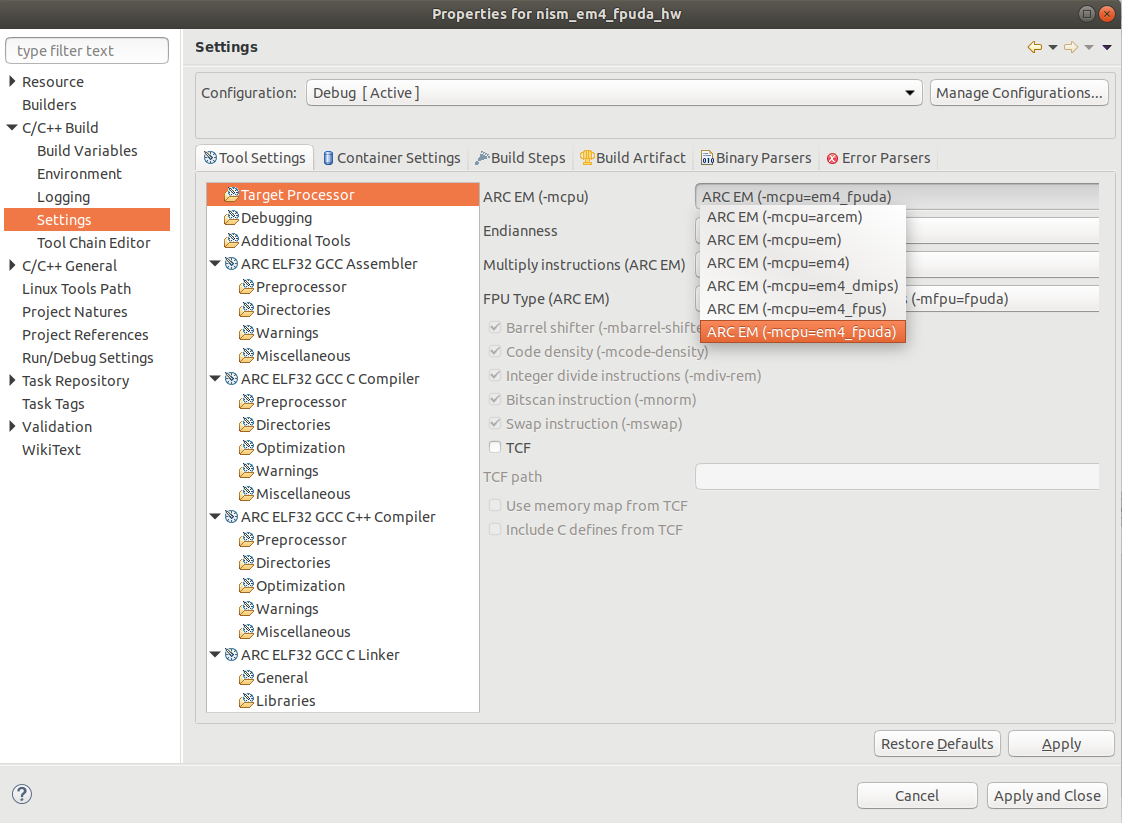
C Project -mcpu options
Building the project
Note
Simple “Hello world” application may be too big to fit into ICCM of a typical
ARC core, because printf() function pulls in a lot of infrastructure which
is usually not present in embedded applications. For demonstration purposes it
is recommended to use TCF templates with an external memory instead of CCM.
Otherwise there would be a warning from the linker during application build
and application may not run correctly on nSIM. So, to run “Hello world”
example it is not recommended to use any of em4*, em5*, em9*, or hs34*
templates.
Right click on the Hello World project and select Build Project from the pop-up menu
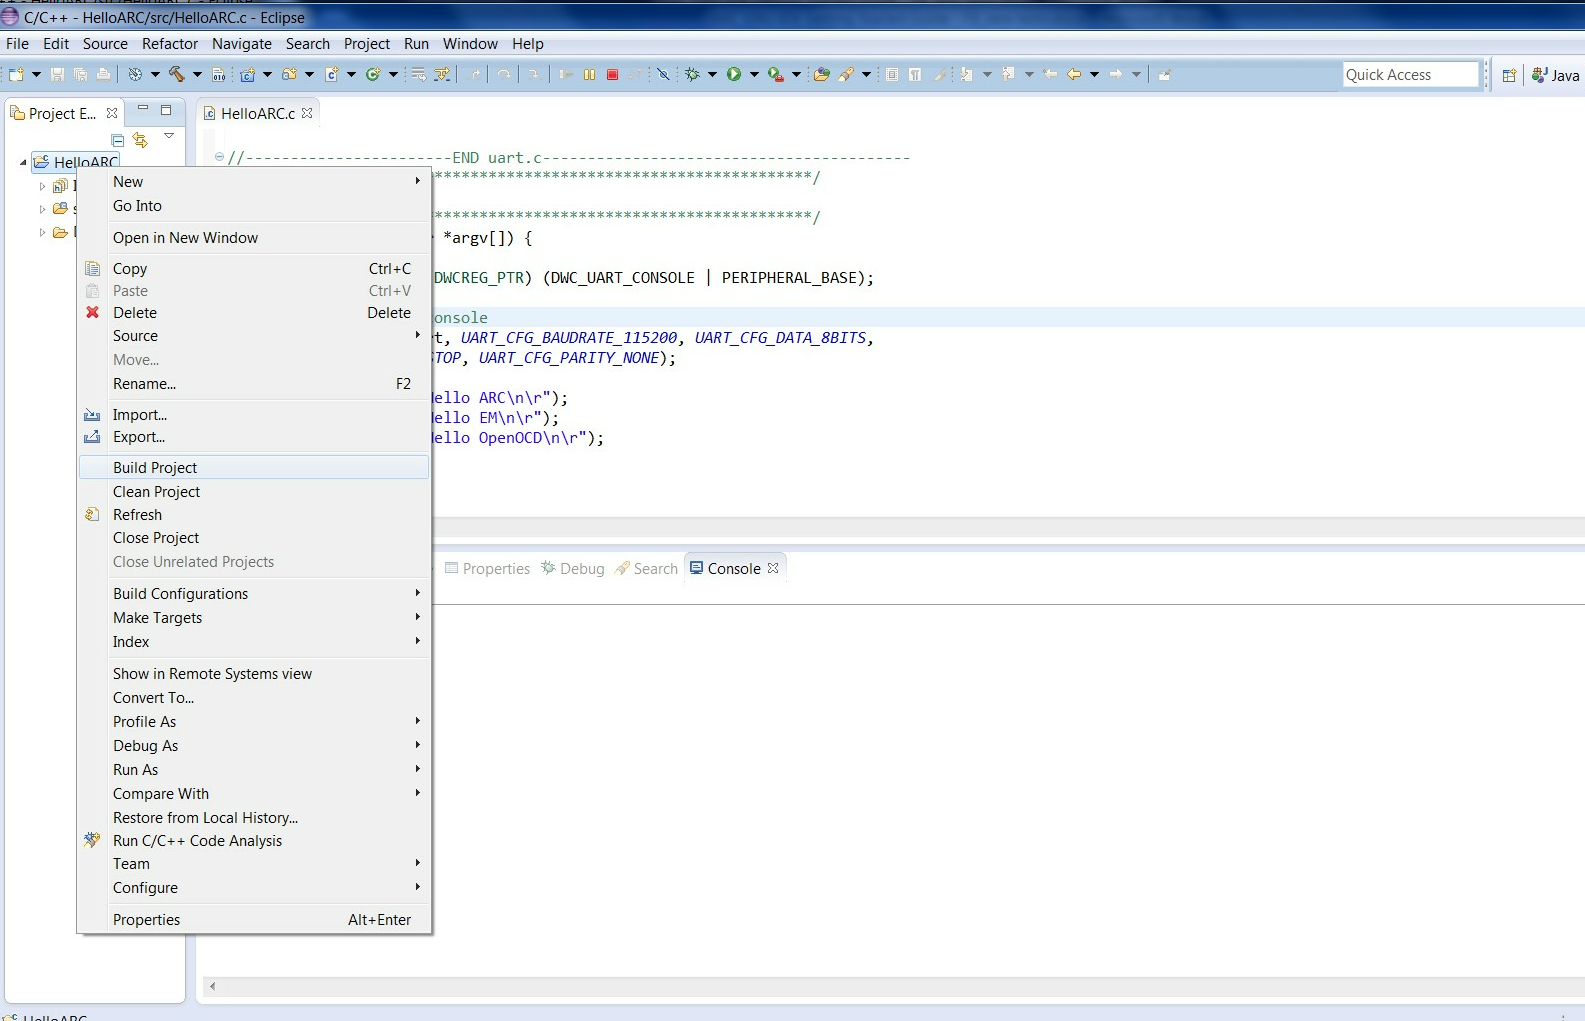
Building a Project
Review the build output log in the Eclipse console tab to confirm success:
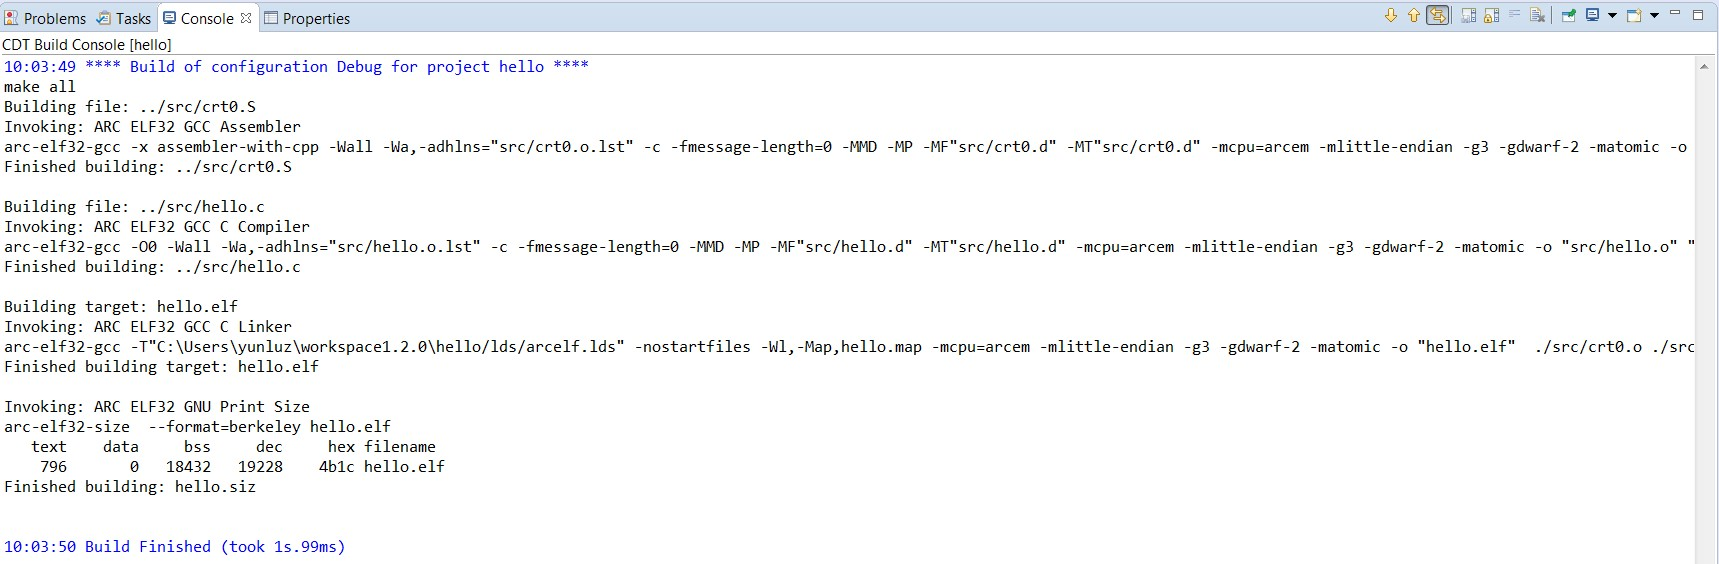
Build Output
Debugging the project
Select Debug Configurations from the Run menu or by clicking on the down arrow next to the bug icon:
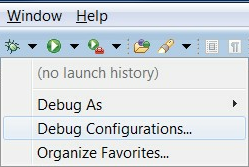
Debug Configurations
Double click on the ARC C/C++ Application or click on the top left icon to create a new debug configuration for the project:
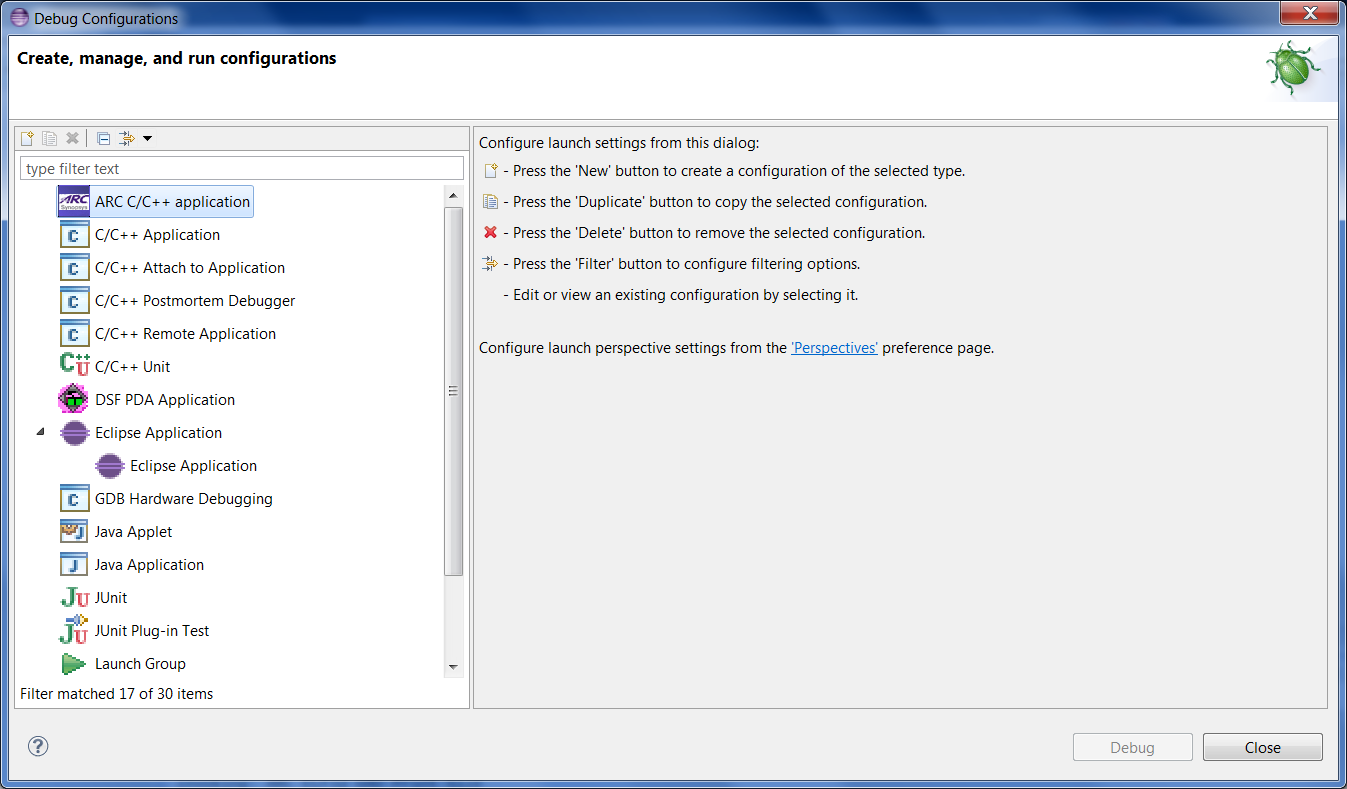
ARC Embedded Debug Configurations
Select a name for the new debug configuration (by default, it equals the project name followed by “Debug”).
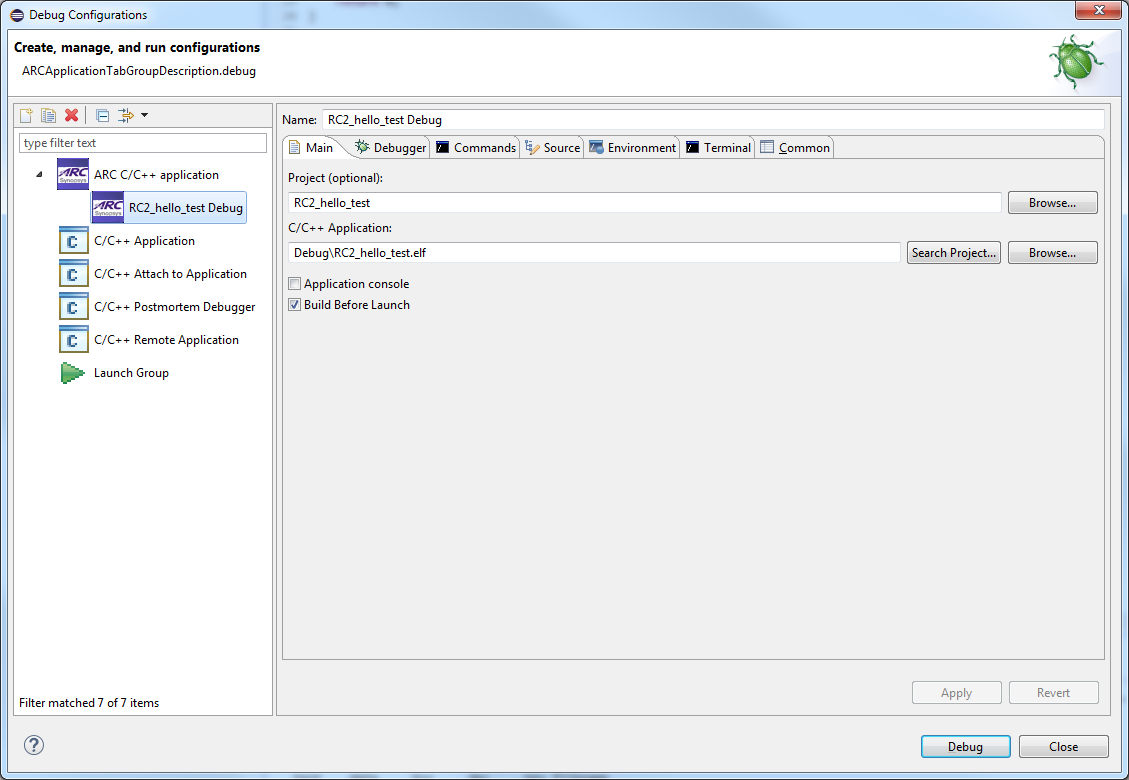
New debug Configuration
Click the Debugger tab and select Gdbserver Settings page.
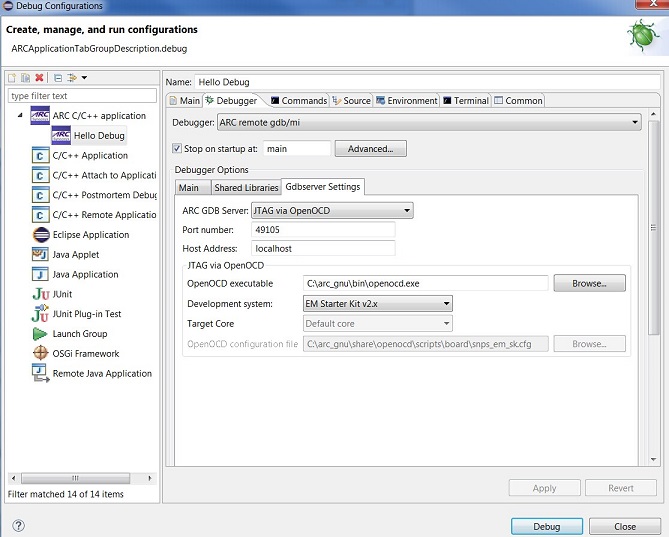
Default values in the Debugger tab
Select nSIM in the ARC GDB Server droplist.

Choosing nSIM on debug tab
In this tab you should specify paths to nSIM executable and to a TCF file.
nSIM has several TCF file templates in the folder ../etc/tcf/templates relative
to nSIM executable file. Choose em6_dmips.tcf file from templates. Then uncheck
Use nSIM properties file? checkbox and click Apply button.
If you choose big endian toolchain, then you need to change .tcf file because it is configured for little endian case. Open your .tcf file and find nsim_isa_big_endian option in nsim.props field. Set it’s value to 1. This way nSIM will be configured for big endian.
To debug application using nSIM, press “Debug” button of IDE.
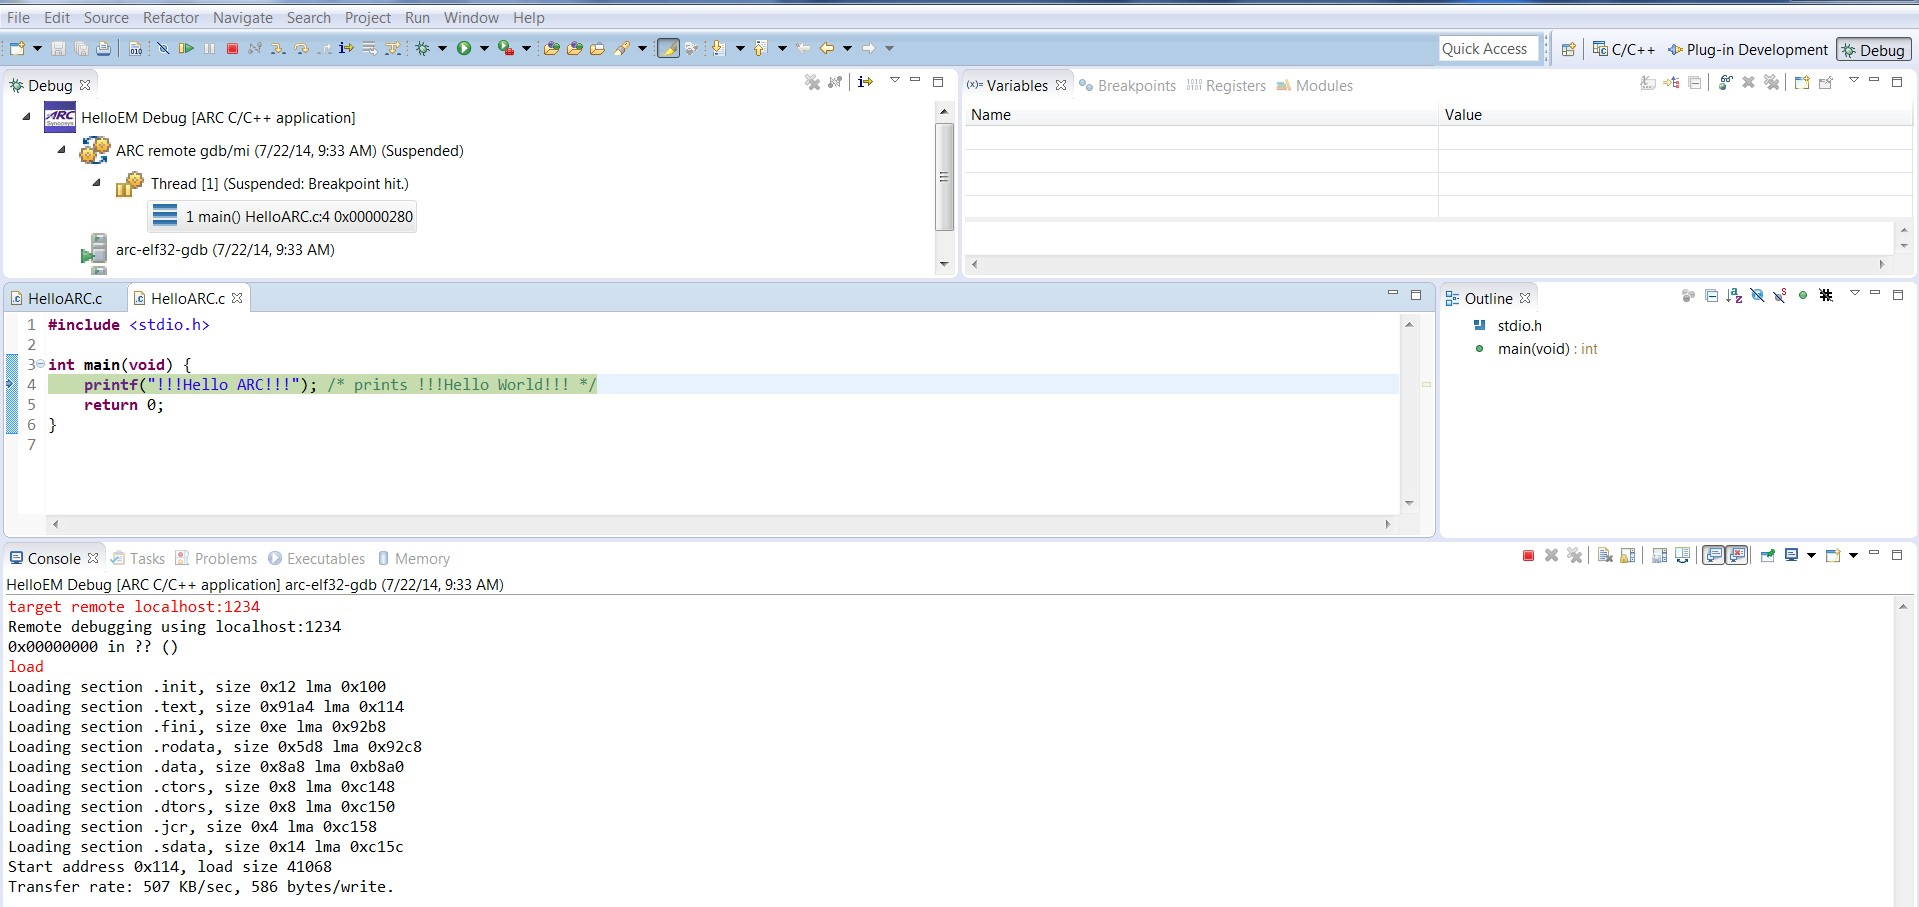
Debugging with nSIM gdbserver
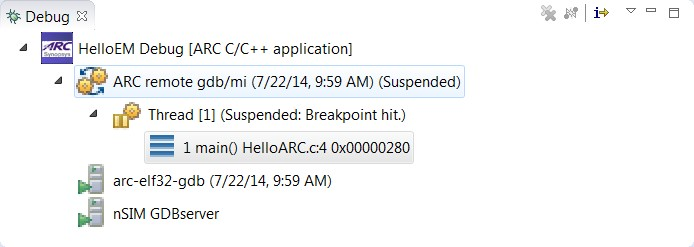
Debug Window
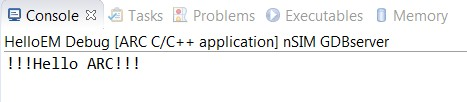
nSIM gdbserver output in console